So yesterday I posted a few links to iPad 2 case tutorials. I woke up bright and early this morning thinking that today I would make one, and I did! I ended up using
MyPatchwork as my main inspiration, but I did do some tweaking.... So without further ado, here it is, my picture tutorial for an iPad 2 case.

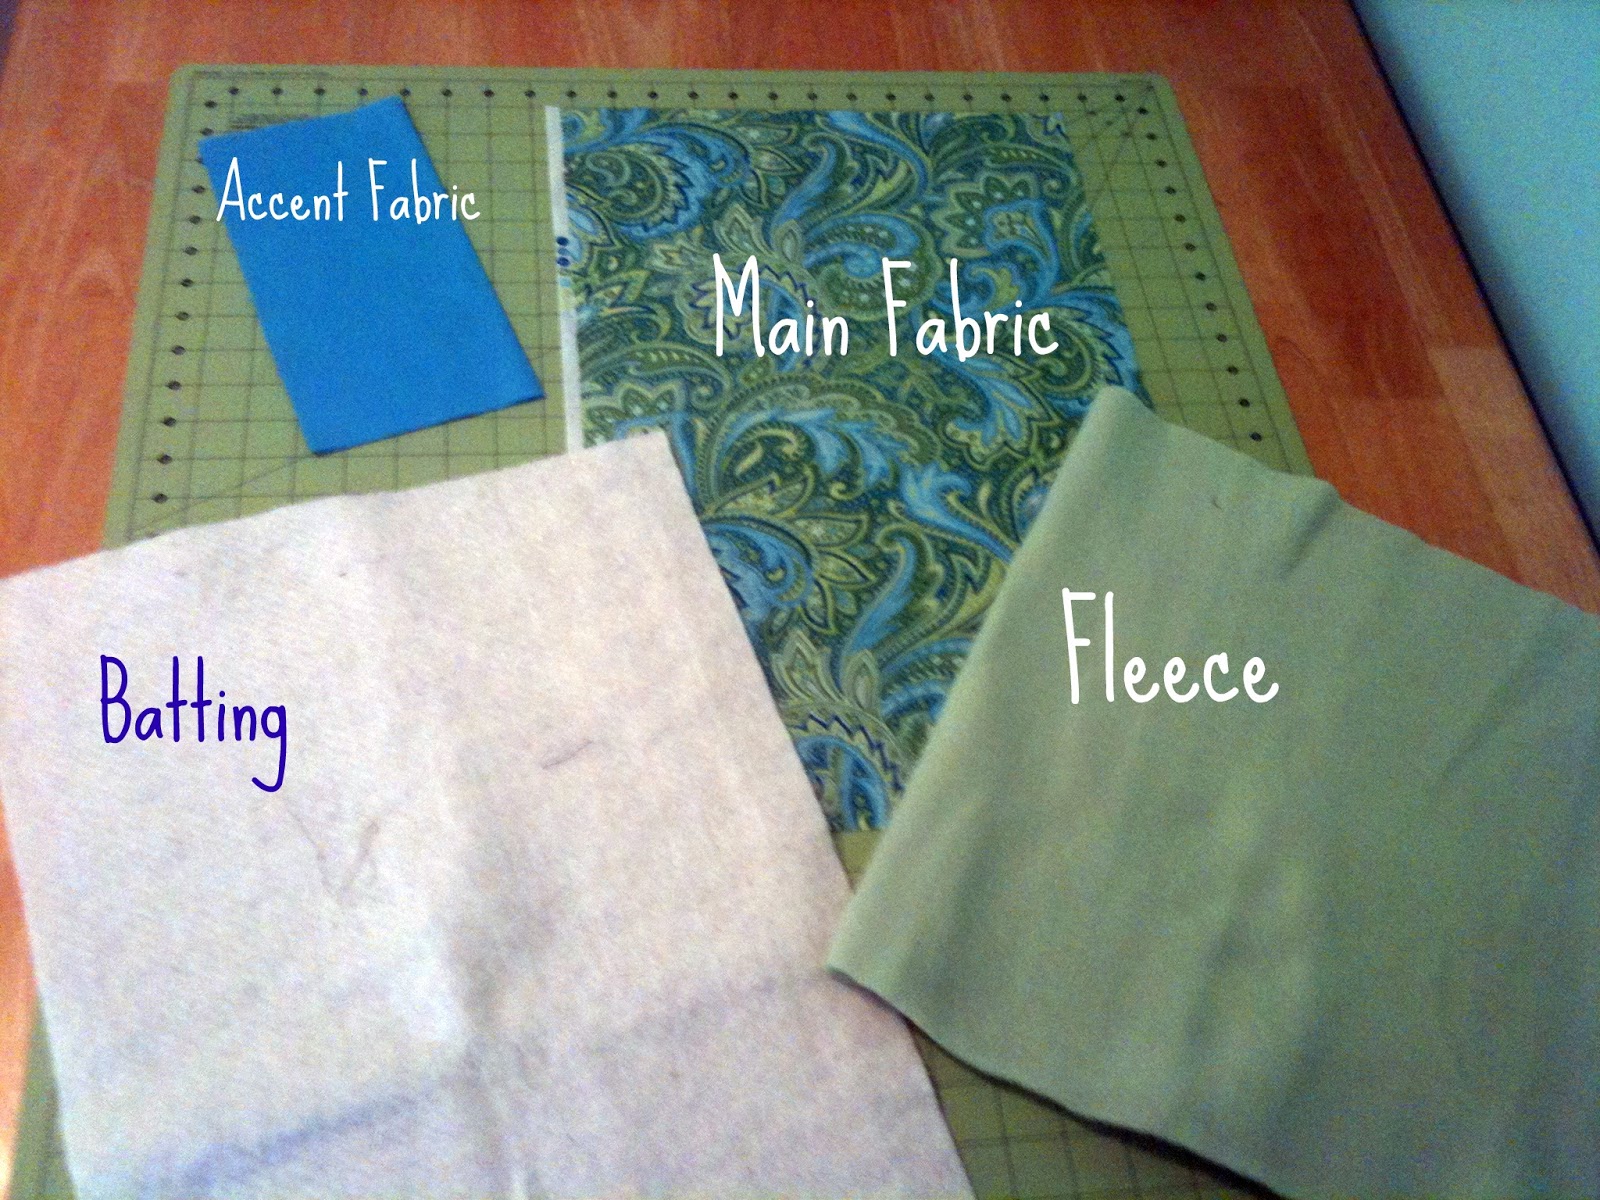
For this you will need...
18"x 10.5" rectangle of main fabric
18" x 9.5" rectangle of fleece
18" x 9.5" rectangle of quilt batting
9" x 4" rectangle of accent fabric
Velcro
Thread
Sewing Machine
All seams are 1/4 inch.
Let's do the inside liner first. Lay your quilting batting to the wrong side of your fleece. Fold over to make a little "pocket". Sew the bottom and the non-folded side of this "pocket". Go ahead and stitch around the top of the "pocket", sealing the fleece and the batting together so that the batting is the outside of this "pocket" and the fleece is the inside. This is going to be what protects your iPad and keeps it snuggly safe.
This is a picture before and stitched all around the top of this "pocket". This is not a necessary step, but does make it easier in my opinion when finishing the sleeve.
Now for the outside. Take your main fabric piece and lay it out. Decide where you want your pocket. If you do not want an outside pocket, omit this step. If you'd like a pocket for the back and front make it twice as long, so 18 x 4.
I found it easier to cut my main fabric in half (9 x9.5) and then attach my outer pocket with a 1/8 inch seam, just to hold it in place. This is attached to the right side of the fabric. I folded the top edge of the outer pocket 1/4 inch and added a decorative stitch so it would not ravel.
Now, place right sides together and stitch both sides and the bottom.
This is what you will be left with. Notice that my liner is shorter than the outer fabric. This allows you to fold the pretty fabric over and give it a very finished look.
Turn your main fabric right side out and then put your liner "pocket" inside the main fabric "pocket" wrong sides together. When you look inside you should see no seams.
Fold over the main fabric and stitch around the edge.
This is the time to add velcro if that is how you want to seal you sleeve. This step is not necessary but I think it adds another layer of protection.
And there you have it, a sweet little padded sleeve for your iPad 2!

 For this you will need...


Thankyou!!
ReplyDelete