You gotta check out some of these neat wreaths!
Showing posts with label Tutorial. Show all posts
Thursday, September 29, 2011
Sunday, July 31, 2011
Homemade Laptop Cover
I stumbled across this tutorial online to make a homemade skin for my laptop. I am pretty pleased how it turned out!
Before....
After!
After!
Tuesday, July 12, 2011
Tuesday Tip 31: Sewing Vinyl
This wonderful tip and bonus a tutorial comes from the blog Rosey Corner Creations. On this post she shows how to make 2 versions of a cute little vinyl card wallet.
She also gives a great tip about sewing on vinyl. Which is so annoying because the presser foot gets all hung up on the vinyl but the fabric sews fine and you end up with a mess! She shows the cheapest, easiest method ever.... Scotch Tape!
Amazing!
She also gives a great tip about sewing on vinyl. Which is so annoying because the presser foot gets all hung up on the vinyl but the fabric sews fine and you end up with a mess! She shows the cheapest, easiest method ever.... Scotch Tape!
Amazing!
Sunday, June 26, 2011
Fabric Bookmark Tutorial
My book loving husband asked me the other night to please make him some fabric bookmarks for the many, many books he is reading at the moment (not including the ones on his iPad). So I got to crafting...
You will need:
Heat n Bond, either no sew or sewable, your choice
Fabric
Iron
Sewing Machine (maybe)
Start by cutting your heat n bond to 2x8 or whatever size you would like your bookmarks to be.
Then cut your fabric 2.5 x 8.5 inches, or just slightly bigger than your heat n bond. You will need 2 fabric pieces per bookmark.
Now peel one side of your heat n bond and place shiny side down on your fabric piece. Iron for a few seconds until it bonds to the fabric.
Notice that the fabric is a little bigger than the white heat n bond? That is what you want, so the heat n bond does not get on your ironing board.
Next, peel the other side of the heat n bond off and place another rectangle of fabric on top of the heat n bond.

If you used sewable heat n bond, you can go to the sewing machine and sew around the edge of your bookmark.
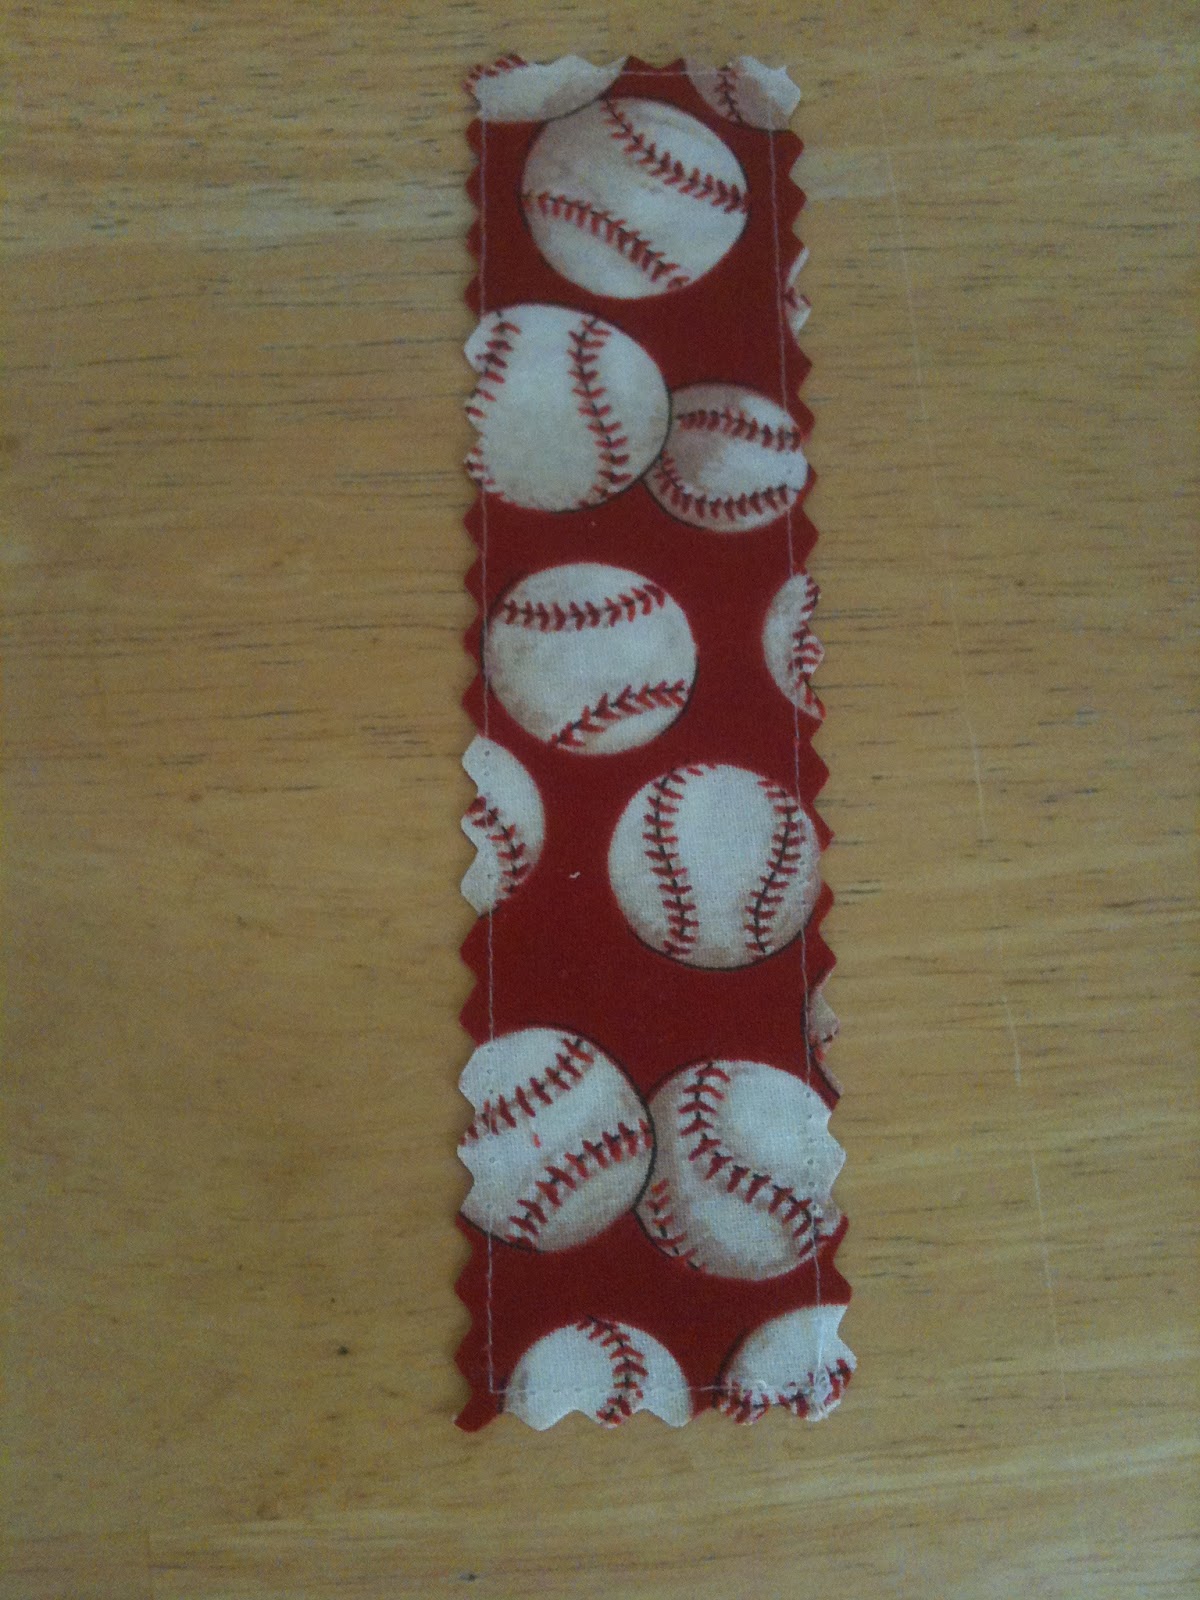
Then trim with a pair of pinking shears (this makes it so the fabric does not ravel). Ta-Da! Bookmark!

This is a version that I did with non-sewable heat n bond. This picture was taken before I used the pinking shears to trim the edges.

Here's the whole lot of them! I think they turned out great. Lots of sports themed ones for my husband and one little penguin one for me :)
You will need:
Heat n Bond, either no sew or sewable, your choice
Fabric
Iron
Sewing Machine (maybe)
Then cut your fabric 2.5 x 8.5 inches, or just slightly bigger than your heat n bond. You will need 2 fabric pieces per bookmark.
Now peel one side of your heat n bond and place shiny side down on your fabric piece. Iron for a few seconds until it bonds to the fabric.
Notice that the fabric is a little bigger than the white heat n bond? That is what you want, so the heat n bond does not get on your ironing board.
Next, peel the other side of the heat n bond off and place another rectangle of fabric on top of the heat n bond.
If you used sewable heat n bond, you can go to the sewing machine and sew around the edge of your bookmark.
Then trim with a pair of pinking shears (this makes it so the fabric does not ravel). Ta-Da! Bookmark!
This is a version that I did with non-sewable heat n bond. This picture was taken before I used the pinking shears to trim the edges.
Here's the whole lot of them! I think they turned out great. Lots of sports themed ones for my husband and one little penguin one for me :)
Sunday, June 12, 2011
iPad 2 Sleeve Tutorial
So yesterday I posted a few links to iPad 2 case tutorials. I woke up bright and early this morning thinking that today I would make one, and I did! I ended up using MyPatchwork as my main inspiration, but I did do some tweaking.... So without further ado, here it is, my picture tutorial for an iPad 2 case.
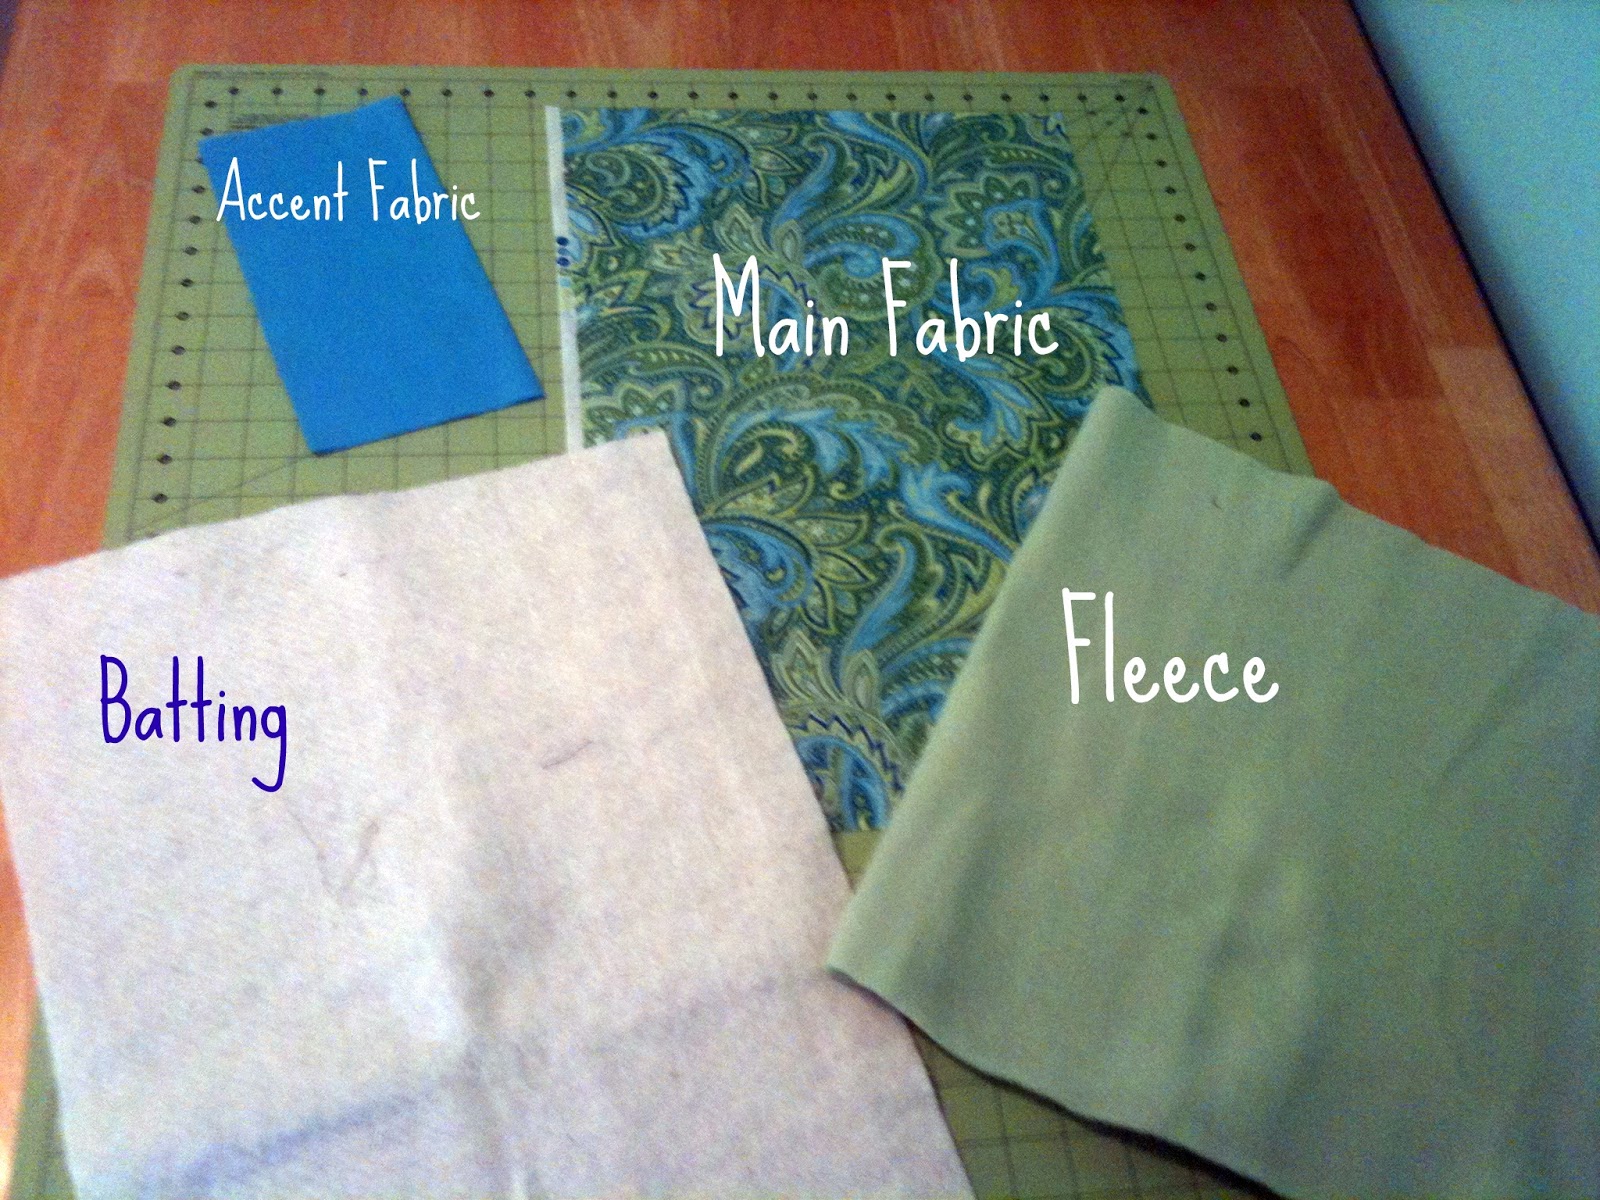
For this you will need...
18"x 10.5" rectangle of main fabric
18" x 9.5" rectangle of fleece
18" x 9.5" rectangle of quilt batting
9" x 4" rectangle of accent fabric
Velcro
Thread
Sewing Machine
All seams are 1/4 inch.
Let's do the inside liner first. Lay your quilting batting to the wrong side of your fleece. Fold over to make a little "pocket". Sew the bottom and the non-folded side of this "pocket". Go ahead and stitch around the top of the "pocket", sealing the fleece and the batting together so that the batting is the outside of this "pocket" and the fleece is the inside. This is going to be what protects your iPad and keeps it snuggly safe.
This is a picture before and stitched all around the top of this "pocket". This is not a necessary step, but does make it easier in my opinion when finishing the sleeve.
Now for the outside. Take your main fabric piece and lay it out. Decide where you want your pocket. If you do not want an outside pocket, omit this step. If you'd like a pocket for the back and front make it twice as long, so 18 x 4.
I found it easier to cut my main fabric in half (9 x9.5) and then attach my outer pocket with a 1/8 inch seam, just to hold it in place. This is attached to the right side of the fabric. I folded the top edge of the outer pocket 1/4 inch and added a decorative stitch so it would not ravel.
Now, place right sides together and stitch both sides and the bottom.
This is what you will be left with. Notice that my liner is shorter than the outer fabric. This allows you to fold the pretty fabric over and give it a very finished look.
Turn your main fabric right side out and then put your liner "pocket" inside the main fabric "pocket" wrong sides together. When you look inside you should see no seams.
Fold over the main fabric and stitch around the edge.
This is the time to add velcro if that is how you want to seal you sleeve. This step is not necessary but I think it adds another layer of protection.
And there you have it, a sweet little padded sleeve for your iPad 2!
18"x 10.5" rectangle of main fabric
18" x 9.5" rectangle of fleece
18" x 9.5" rectangle of quilt batting
9" x 4" rectangle of accent fabric
Velcro
Thread
Sewing Machine
All seams are 1/4 inch.
Let's do the inside liner first. Lay your quilting batting to the wrong side of your fleece. Fold over to make a little "pocket". Sew the bottom and the non-folded side of this "pocket". Go ahead and stitch around the top of the "pocket", sealing the fleece and the batting together so that the batting is the outside of this "pocket" and the fleece is the inside. This is going to be what protects your iPad and keeps it snuggly safe.
This is a picture before and stitched all around the top of this "pocket". This is not a necessary step, but does make it easier in my opinion when finishing the sleeve.
Now for the outside. Take your main fabric piece and lay it out. Decide where you want your pocket. If you do not want an outside pocket, omit this step. If you'd like a pocket for the back and front make it twice as long, so 18 x 4.
I found it easier to cut my main fabric in half (9 x9.5) and then attach my outer pocket with a 1/8 inch seam, just to hold it in place. This is attached to the right side of the fabric. I folded the top edge of the outer pocket 1/4 inch and added a decorative stitch so it would not ravel.
Now, place right sides together and stitch both sides and the bottom.
This is what you will be left with. Notice that my liner is shorter than the outer fabric. This allows you to fold the pretty fabric over and give it a very finished look.
Turn your main fabric right side out and then put your liner "pocket" inside the main fabric "pocket" wrong sides together. When you look inside you should see no seams.
Fold over the main fabric and stitch around the edge.
This is the time to add velcro if that is how you want to seal you sleeve. This step is not necessary but I think it adds another layer of protection.
And there you have it, a sweet little padded sleeve for your iPad 2!
Saturday, April 2, 2011
Envelope Pillow Tutorial
To make an envelope pillow you will need:
-Pillow form of your choice
-Fabric of your choice
-Scissors and/or rotary cutter
-Ruler and mat
-Sewing machine w/ thread (not pictured)
First off, measure your pillow if you are covering an older one or if new, look on the package and get the size of your pillow form. Cut your fabric 1 inch bigger on each side than the pillow form.
Example: My pillow form was 18x18
I cut my fabric 19x19
This is the front of your pillow.
Now we will cut the back "envelope".
Cut a rectangle that is 1 inch taller than you pillow form and 1 inch longer, plus 4-6 inches.
For my pillow:
18x18 Pillow form
Back piece: 19x25
Now, cut your rectangle right down the center. Making sure it is still 19 inches tall on each piece.
So for my back piece, I cut it in half at 12.5". Now I have 2 pieces that are 19"x12.5"
Now, serge or double fold a small hem on one of the 19 inch edges. Do this for each piece. This is going to be where your pillow slips in so you want the edges finished nicely.
Pin and sew.

Take your fabric that will be the pillow's front (that is my 19x19 square). Lay it pretty side up on a table.
Now lay one rectangle, pretty side down on top of the square, lining up all the raw edges. Make sure the edge you hemmed is facing the middle.
Now take the other rectangle and repeat what you did above. This will overlap part of the 1st rectangle. That is what you want!
Now sew all around the edges with 1/4 inch seam.
Clip your edges, making sure not to clip in the seams or you will get a hole! Clipping allows you to push the fabric and get a nice crisp corner.
Now, flip it inside out and use the eraser end of a pencil or my favorite, a chopstick, to push out the corners.
Insert your pillow form and there you have it! See how my hand is in the envelope? Very cute and easy to clean. Just remove the pillow envelope and wash it.
Now, sit back and relax on your new comfy pillow. You've work hard, you deserve it :)
-Pillow form of your choice
-Fabric of your choice
-Scissors and/or rotary cutter
-Ruler and mat
-Sewing machine w/ thread (not pictured)
First off, measure your pillow if you are covering an older one or if new, look on the package and get the size of your pillow form. Cut your fabric 1 inch bigger on each side than the pillow form.
Example: My pillow form was 18x18
I cut my fabric 19x19
This is the front of your pillow.
Now we will cut the back "envelope".
Cut a rectangle that is 1 inch taller than you pillow form and 1 inch longer, plus 4-6 inches.
For my pillow:
18x18 Pillow form
Back piece: 19x25
Now, cut your rectangle right down the center. Making sure it is still 19 inches tall on each piece.
So for my back piece, I cut it in half at 12.5". Now I have 2 pieces that are 19"x12.5"
Now, serge or double fold a small hem on one of the 19 inch edges. Do this for each piece. This is going to be where your pillow slips in so you want the edges finished nicely.
Pin and sew.

Take your fabric that will be the pillow's front (that is my 19x19 square). Lay it pretty side up on a table.
Now lay one rectangle, pretty side down on top of the square, lining up all the raw edges. Make sure the edge you hemmed is facing the middle.
Now take the other rectangle and repeat what you did above. This will overlap part of the 1st rectangle. That is what you want!
Now sew all around the edges with 1/4 inch seam.Clip your edges, making sure not to clip in the seams or you will get a hole! Clipping allows you to push the fabric and get a nice crisp corner.
Now, flip it inside out and use the eraser end of a pencil or my favorite, a chopstick, to push out the corners.
Insert your pillow form and there you have it! See how my hand is in the envelope? Very cute and easy to clean. Just remove the pillow envelope and wash it.
![]() |
| Pictures edited and text added using Picnik |
Subscribe to:
Posts (Atom)